I had several people ask me how to make the camouflage cookies that I made for Valentines Day. The technique is very easy, but it does take longer to decorate the cookies than just filling with one color and then layering with decorative details. In the end, the time probably works out to be about the same since you don't wait for each color to dry. This is called the wet on wet technique and the camo cookies come out really pretty. Remember that I'm a Glaze icing gal. The technique would be the same for those that use Royal icing, but you might have to work a little faster since royal hardens more than glaze does. Lets get started...
I made both chocolate cookies using LilaLoa's delicious recipe and my own sugar cookies. Looking back, I should have used the sugar cookies for this tutorial so you could see them better. Sorry about that. So here are my large heart cookies and I've already outlined them with the designs that I want to use for my camo cookies.

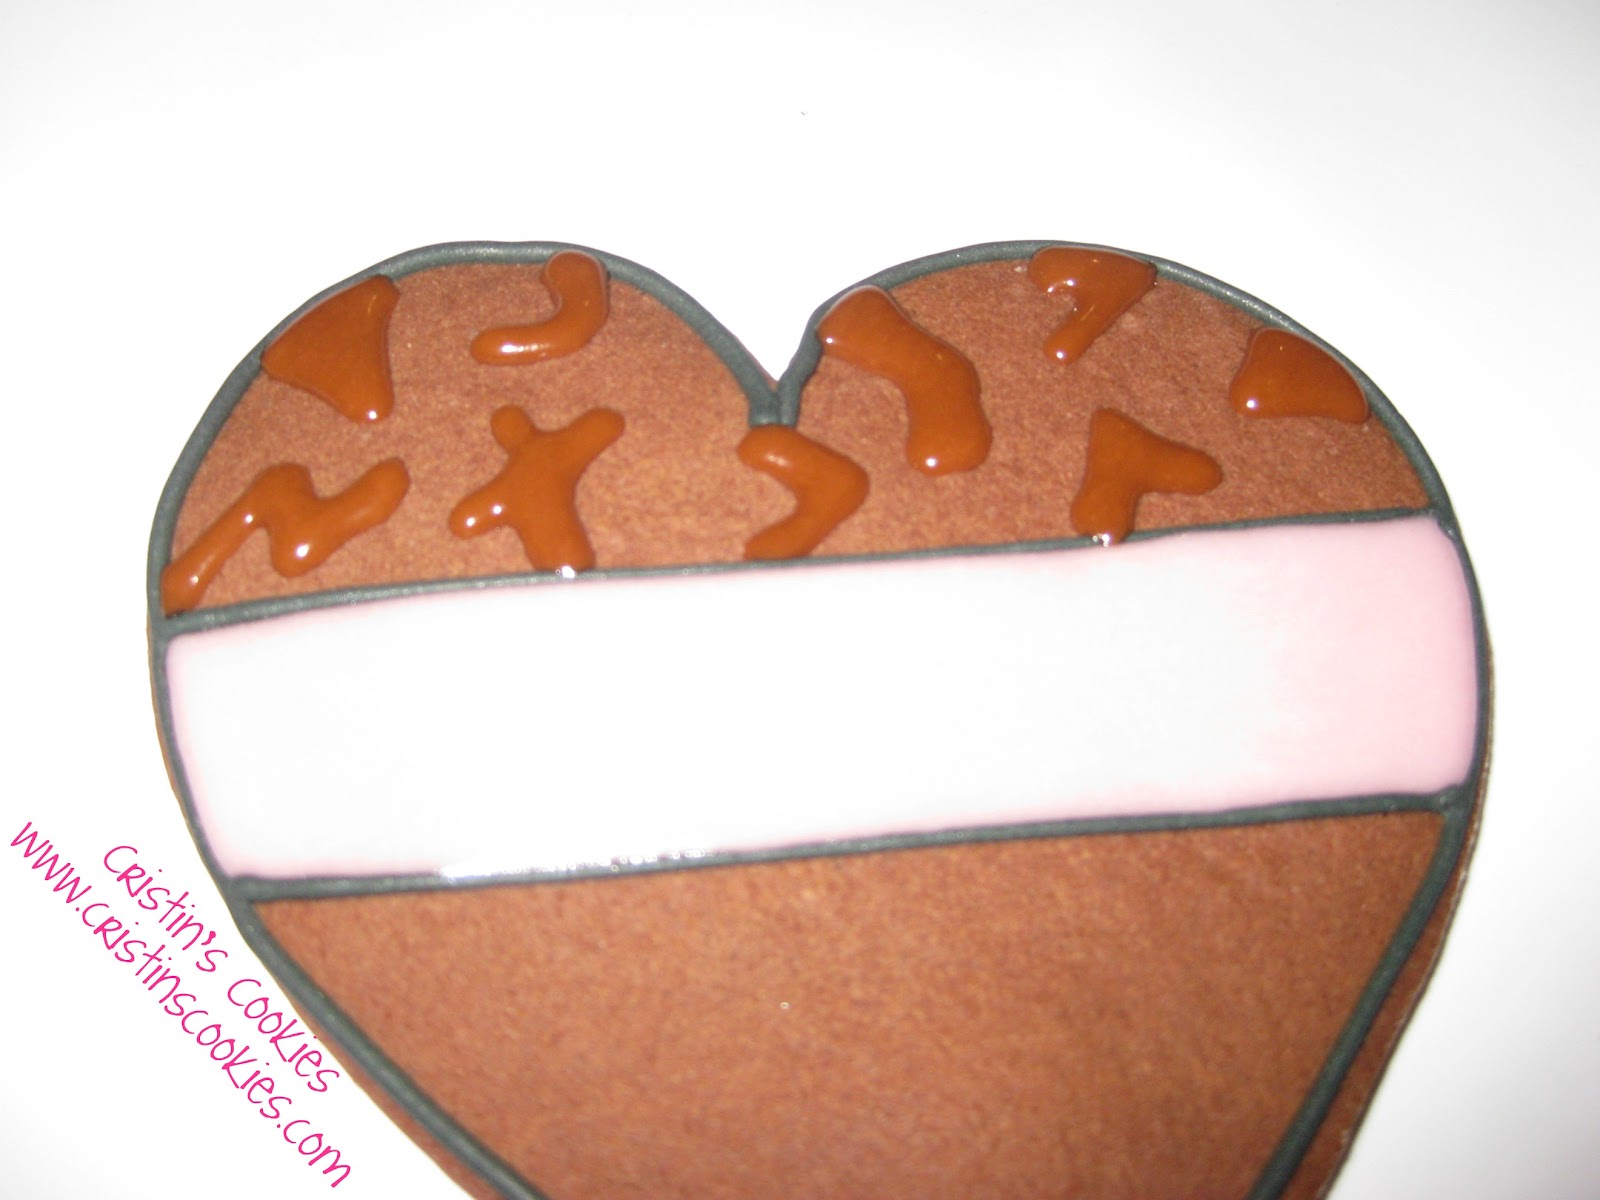
After I filled the section that I don't want camouflage, then I start in. Start with one color and put random shaped blobs on your cookie. I have a hard time with randomness and like everything to be super precise. If your brain starts working this way, just give yourself a small slap upside the head. Randomness is key here.
Then take your second color (don't wait for the first color to dry) and make random shaped blobs alongside the first colored blobs. I found that it helps if you start to connect the blobs rather than leaving it to the last color. I know, that makes a whole lot of sense right? You'll see when you make yours.

I forgot to take a picture of the 3rd color, sorry. For me, in this color scheme, I used brown, red, dark pink and light pink. So take your 3rd color and continue with the random shaped blobs next to your 2nd color and then finish off the empty holes with your 4th color. If you find that the last of your empty spots are too large, then I would recommend going back with one of your first colors and adding in.

Here it is again. First color random shaped blobs.

2nd and 3rd colors. See I skipped again. Sorry. It was about 3am at this point! See in the picture below that if you start to connect the blobs then it leaves a specific empty spot to fill. That worked easier for my twisted little brain to attempt to be random.

and the finished product. By the way, you can make camouflage cookies with 3 or 4 colors or whatever works for you. I chose 4 colors for my Valentines theme.

then I wrote cutesie stuff in the center blank area and it became a camouflage Valentine cookie. Pretty easy right?

Thanks again to Jodi of Wonderland Cookie Company for the idea of camouflage heart cookies. She made some in blues and marine colors that were gorgeous.

I have lots more cookies coming up to show you and a few more tutorials too.

I have 12 EXTRA Valentine cookies, so lets put them to good use. Want to be entered to win cookies from Cristin's Cookies? Want to help those battling Cancer? Make a minimum $25 donation to the LiveStrong Challenge in support of Eddie's Angels by THIS Friday at 8pm and I will use Random.org to choose one winner that I will ship 12 Valentine cookies to. Donate here. Thanks for supporting those battling Cancer!
I'm working in my office all day today while it's gorgeous outside. Wish me luck in getting my office organized and productive instead of jumping on that pretty pink bike and going for a bike ride :-)

Surely enjoyed your tutorial, Cristin. I know what you mean about having a hard time with "randomness" but you pulled it off very well. I like the looks of all your Val. cookies.....now, camo for St. Pat's? How about Camo for Madi Gras? Oh, the inspiration is endless! lol Blessings, Donna B.
ReplyDeleteLoved the post and tutorial, Cristin! I am going to try and attempt -- I miss being involved in all your fun challenges, but know I am right there, googling over your awesome cookies and all the cookies of those that participate! :)
ReplyDeleteCristin you are the best!! thank you for such a great tutorial!!
ReplyDelete@Kara Oh my gosh Kara! My mouth dropped open when I saw your camo birds! ADORABLE! What a creative idea! I absolutely LOVE these! Best bird I've ever seen for sure! Love it! Thanks for sharing!
ReplyDelete