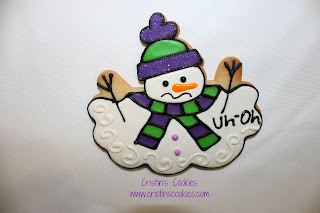
I made a new cookie cutter the other day and I asked everyone on Facebook what they thought it was. Most people thought a clown, some saw a princess, another saw a chicken. No one guessed it. What do you see?
Cookie Cutter Available HERE
Download Tutorial Cards HERE
Free Printable Cookie Tags HERE
Cookie Cutter Available HERE
Download Tutorial Cards HERE
Free Printable Cookie Tags HERE
Well here is what I saw....
I made a few extra of these cookie cutters since so many have been asking for them. You can find them HERE
Here in my part of sunny California, we don't have many snowmen. If we did, they would definitely look like these cookies ;-)
Here in my part of sunny California, we don't have many snowmen. If we did, they would definitely look like these cookies ;-)
I stayed up til 6am decorating these and some other cookies last night. I'm really looking forward to some sleep after Christmas. And since I've had so many requests, I might start selling some of my cookie cutters. I haven't decided for sure yet. It's hard to imagine how to fit more activities into my bulging schedule. If I do, here's a tutorial on how to create your own melting snowman... Outline your design onto your cookie.
I love sanding sugar. You can start with the part that will have sanding sugar, like I did below or you can save the area that will have sanding sugar for the last step. If you save it for the last step, you have to make SURE that the rest of the parts of your decorated cookie are completely dry otherwise the sanding sugar will stick to those areas too. If you start with the sanding sugar, you have to make sure to clean off ALL little specs of sanding sugar from the other areas of your cookie or it may bleed from bits of the colored sugar. So challenges both ways.
After you've cleaned all the excess sanding sugar off using a new paint brush, then fill your snowman with white icing and drop in two candies for the eye balls or you can add eye balls using icing later after the white has fully dried.
Then fill the sections of your scarf. If you decorate little areas like my scarf below, then you may need to use a toothpick to move the icing within the small section. This will help alleviate any craters or little holes after the icing dries.
After the white icing is completely dry, then you can choose to write "uh-oh" on your melting snowman. You can use icing with a very small tip or use an edible marker pen. I did this one with edible marker. And then I added some swirlies for the snow on the snowman.
Also add an orange carrot nose to your dry snowman and using an edible marker or icing, draw a sad face on your snowman. I used an edible marker for the mouth.
Also add an orange carrot nose to your dry snowman and using an edible marker or icing, draw a sad face on your snowman. I used an edible marker for the mouth.
On this snowman (and the others), I used icing with a number 1 tip to write uh-oh.
I had a lot of fun with all these melting snowman cookies!
Ready for a cute story?
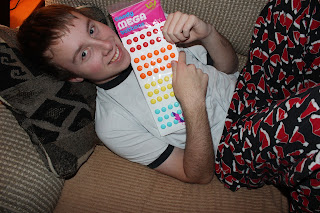
Mom to 18-year old son: Want to open a present?
Nick: Can it be one of your cookies?
Mushy Mom: awww... and then the tears start.
Love my kids!
Merry Christmas everyone! Santa Claus comes TONIGHT!
Snowman blog background for today:


No comments:
Post a Comment
Thank you for taking the time to leave a comment! I love hearing from you! Cristin